Greetings!!
I hope this tutorial can make your modding experience much easier. It works for any skin mod you might want use on your Jomo griffin avatar - including male or female ones.
This tutorial was built to make your
Creator et Creatura and
[GWI] fit to Jomo Griffin avatars. For other modders it might help as a guide but i can´t guarantee.
Firstly, the creator has added an extra folder to the avatars content box, the *Basis Texture ( name of your jomo griffin model). It provides all textures used on the avatar, plus if you want to start making your own skins, you can use the basis and download the developers kit found it the inworlds mainstore.
But why that?
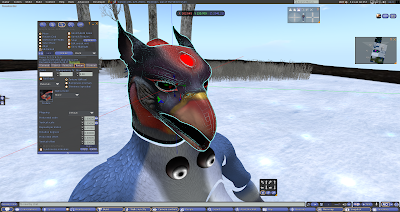
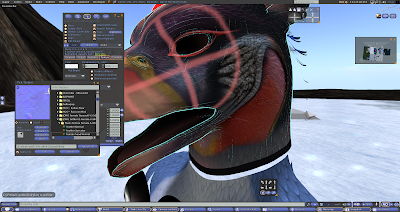
For those already used to mod jomo avatars you can just skip this paragraph. For the beginners in the customization universe the creator has provided a model showing all faces the body has. Different colors, different faces. - Please note the neck, arms and waist tips, they all have a different color ring around them. This was made to avoid texture clipping when your avatar moves. *( texture clipping = blinking effect you can note when 2 parts with different textures are together). Confusing? Check the screen shots, it might help you better.
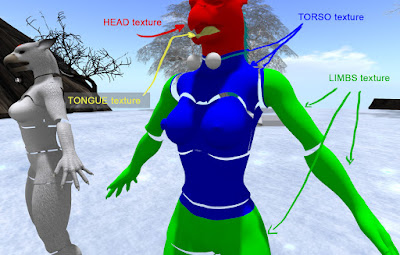 |
| texture and faces dummy: each color is a different texture. |
Lets get started!!
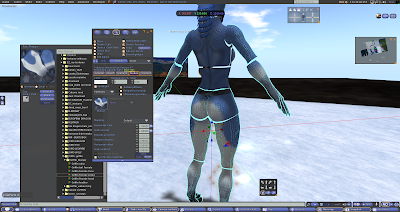
For a perfect modding job, mind the extra faces.
Remember the editing tools "edit linked parts and selected faces. These are going to be often used in this tutorial. Tou can always enlarge the pictures for details.
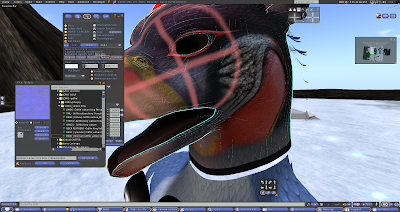
 |
| checked? let´s start! |
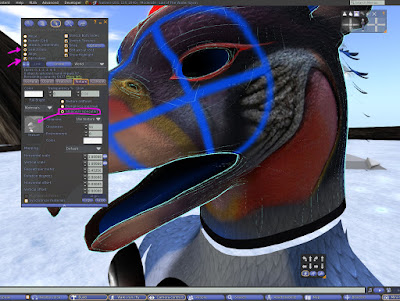
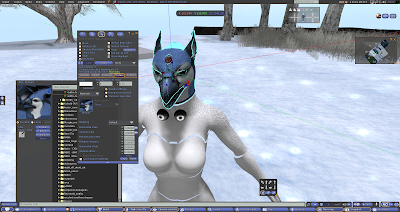 |
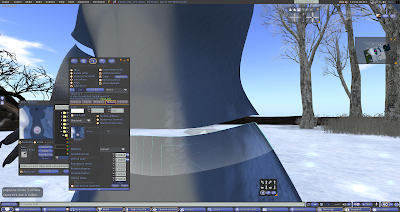
| select liked parts and add HEAD texture. |
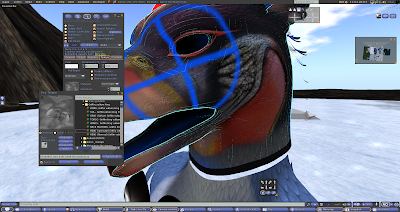
 |
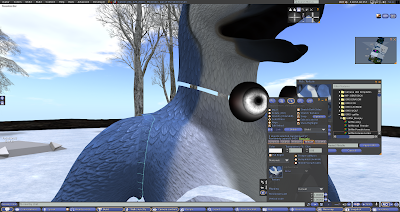
| Oh! my griffin gem darkened! No fear. Select Linked parts and select face, add blank texture to it. - see? shiny again! |
 |
| blank texture. |
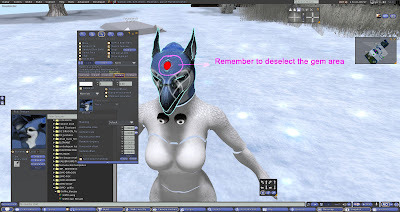 |
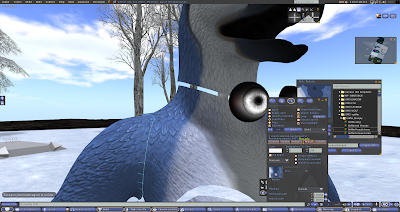
| OR... when selected linked parts, press selected face ans shift to deselect just gem face and voilá! Head Texture applied without darkening the gem. |
 |
| select linked parts + shift allows you to select and apply textures in several pieces. |
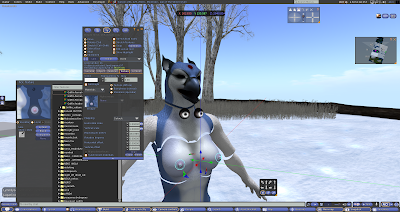 |
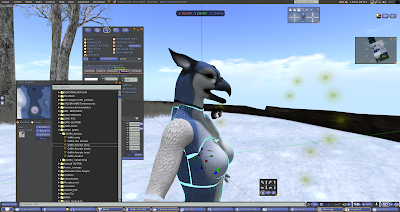
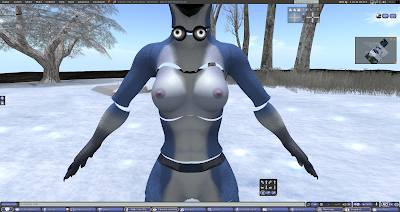
| nipples are also TORSO texture. |
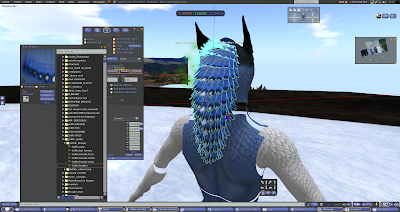 |
| FEATHER texture for neck piece. |
 |
| LIMBS go for legs, arms, hands and waist. |
 |
| so far so good? Awesome! now face details texturing job. |
 |
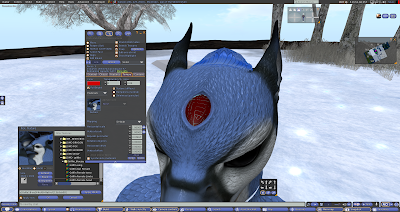
| select linked parts, selected face to neck tip ring and add TORSO texture. |
 |
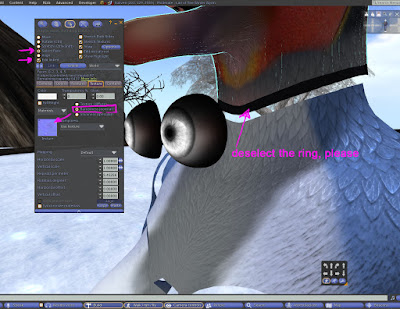
| There are two rings in the female body ( and just one ring to make) - select linked parts and selected faces to add TORSO texture. |
 |
| It is right when you see a uniform skin going grom waist to belly |
 |
| sometimes the textures are the same color, but the feather detail is different. I recomment to spend a lil time swithing arm ring faces to TORSO texture for a non clipping effect. |
 |
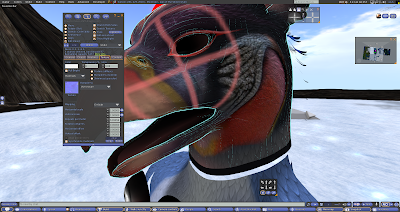
| It is right when you have smothy effect coming from arms and going to torso. Repeat proceduce with the head piece, selecting the neck ring and adding TORSO texture. |
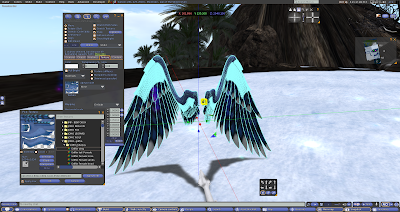 |
| Wings, Tail and Penis get only one texture. For Tail, if you want the glowing gems effects remember to deselct their faces when adding the texture. |
VULTURE MOD:
That´s a new trick. For vulture mod i had to add new maps. NORMAL and SPECULAR ones.
What are they?
Normal maps are special textures added to bumpiness ( Normals) area to give a 3d texture effect. That gives the feeling of "whoa!! this is very leather like" or " it´s almost like real bricks". Jomo uses a lot of normal maps for its unique "feather" textures, or scales and fur - from other jomo avatars.
Specular maps are also special texture added to shininess area to give the shiny effect of things.
for the skinned, almost bald effect of the king vulture mod i added 2 maps. The texturing job requires a bit more of knowledge... hope the tutorial helps you make it through without major stress.
 |
| Firstly, add the HEAD texture to Diffuse area. |
 |
| If you have graphics on high and above, you´re going to notive a "feather" effect over the skin area. It´s up to you leaving like this of changing maps for a wrinkled skin 3d effect. |
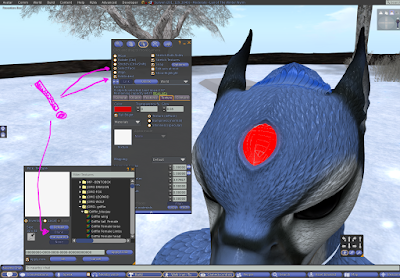
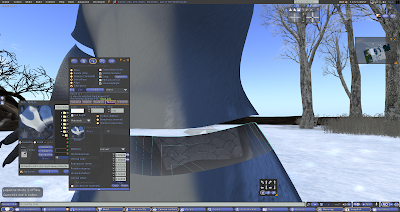
ok! You´ve decided to check how hard is the job ? First check bumpiness to start working with normal maps. Select Linked parts and select the whole head. After select "selected faces" and using shift - deselect neck ring. This is very IMPORTANT.
 |
| ok! You´ve decided to check how hard is the job ? First check bumpiness to start working with normal maps. Select Linked parts and select the whole head. After select "selected faces" and using shift - deselect neck ring. |
 |
| You know you´re working normal maps when you see the red guide mark over your avatar texture, and in the editing window a bluish squase for texture image. |
 |
| press the bluish texture square to go to textures inventory - select NORMAL head texture to use. |
 |
| add the Normal head texture ( it´s also bluish). |
After closing edit window you´re going to note a different head texture. It´s time to add specular map. Edit the body again, and check shininess area in the middle of edit window. Select linked parts and selected face. Press shift to deselct neck ring again and start specular job .
 |
| After closing edit window you´re going to note a different head texture. It´s time to add specular map. Edit the body again, and check shininess area in the middle of edit window. Select linked parts and selected face. Press shift to deselct neck ring again and start specular job . |
 |
| you know the neck ring is deselected becase its texture seems darken than the selected area. |
 |
| click the silver texture box and choose SPECULAR head from your modding folder and use. This is going to make you not see feather shininess on skin area when moving your avatar under light. Again These maps only work if you´re using high or above graphics settings from your SL preferences. |
 |
| and you´re ready to go! congratulations.. this is not an easy job. |
And if you feel you need help, please do not hesitate to contact me. Drop me a notecard or poke me when im inworld.
Happy modding!!!
Tiamat Bingyi


